Verify a document with the API
Send a PDF to the VerifyPDF REST API with your API key in the API-KEY header. Each verification consumes one document and returns the same result as the dashboard.
The VerifyPDF REST API lets your own systems verify documents without anyone opening the dashboard. This article covers the high-level flow. For the full request and response details, use the reference at /agents/.
Before you start
- The REST API is available on the Professional and Corporate plans. It is not included on Basic or a no-plan account. See Plans explained.
- You need an API key. See Generate and manage API keys.
The basic flow
- Create an API key in the Developers section and copy it once.
- Send the PDF to the API with your key in the
API-KEYrequest header. - Read the result, which comes back with the same trust score and fraud-risk rating you see in the dashboard. See Read your verification result.
Each API verification consumes one document from your monthly allowance or prepaid balance, exactly like a dashboard upload. See How prepaid bundles work.
Add your own reference id
You can attach a custom_id to a verification, for example your internal case number or order id. That lets you look the verification up later by your own reference. Each custom_id must be unique within your account.
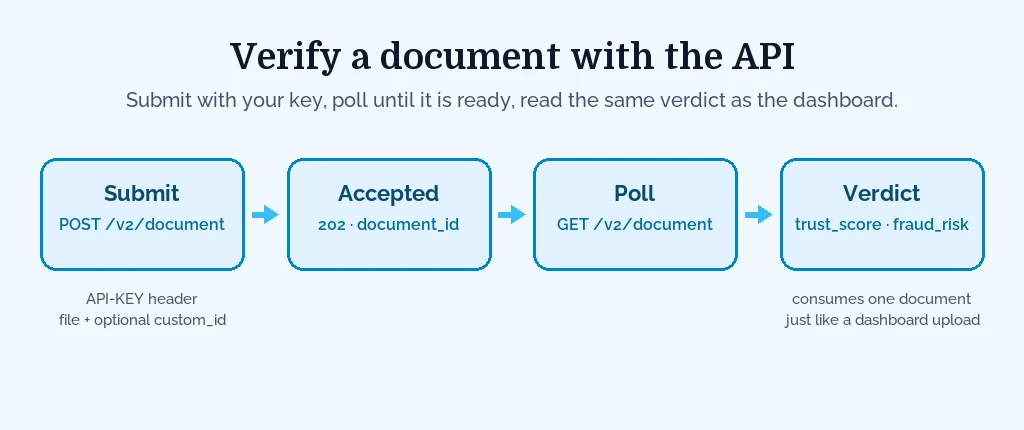
A quick illustration
At a high level, a request sends the PDF along with the API-KEY header holding your key. The exact endpoint, request body and response format live in the API reference at /agents/ and inside the dashboard’s Developers section. Use those for copy-ready examples rather than guessing.
Test first, then go live
While you build, use a test key. Switch to a live key for real verifications. See Test vs live API keys.
Next steps
- Want results pushed to you instead of polling? See Set up webhooks.
- Need the full reference? Go to /agents/.